Showing posts with label dessert. Show all posts

Friday, January 23, 2015

Homemade Hot Chocolate


Homemade Hot Chocolate

Ingredients
2 cups whole milk
4 tablespoons unsweetened cocoa
1 1/2 tablespoons maple syrup
1 teaspoon vanilla
pinch of sea salt
dash or two cinnamon

Recipe
  1. Mix all ingredients together in a medium sauce pan over medium heat.  Bring just to a boil then simmer on low for a few minutes.  You may want to cool before placing in cups.  Serve warm, top with marshmallows or whipped cream if desired.  Be careful it will need to cool before drinking!


Friday, December 19, 2014

Vanilla Sugar Cookie Cutouts


I was trying to track down Michael's Grandma's famous recipe this year.  Apparently some mysterious relative gave it to me a few years ago but no one claims to recognize it!  I have bits and pieces but not the whole thing.  Maybe it was the the ghost of Christmas past.  So I decided to make up a recipe this year, fingers crossed that it was good.  I taste tested it on my Daisy troop and some parents and everyone just loved it!!  I am not a master baker so thank you Christmas ghost for pushing me to try something new.  The cookies retain their shape, are soft in the center with a good firm bite.  They are sweet enough unfrosted but not overly sweet with frosting.  I didn't get the best picture because decoration is all about fun anyway!

Vanilla Sugar Cookie Cutouts

Ingredients
1 1/2 cups butter
3 cups sugar
4 eggs
1 tbsp vanilla (kick it up a notch by adding vanilla bean seeds)
5 1/2 cups of flour
2 tsp baking powder
1 tsp salt
powdered sugar for rolling

Recipe
  1. In a large bowl cream the sugar and butter until it's lightened in color and is light and fluffy.
  2. While that's mixing - combine flour, baking powder and salt in a medium bowl and whisk to mix together.
  3. Add eggs and vanilla to creamed butter and sugar and mix thoroughly.
  4. Slowly add flour mixture to wet mixture.  Mix until just combined.  Scrape the bottom and sides as needed.  I usually hand stir after mixing to be sure I got all the flour incorporated.
  5. Divide into four sections.  Roll them into balls and flatten.  Wrap with plastic wrap.  Chill for at least 4 hours or overnight.
  6. Preheat the oven to 400 degrees.  Line cookie pans with parchment paper.
  7. Remove the dough a section at a time for the fridge.  You will need to knead the dough.  Roll the dough out on parchment paper.  It will be hard to roll at first but will warm very fast so work quickly.  Use powdered sugar on the paper and rolling pin as needed.  Roll to 1/8 for crispy, 1/4 for softer but sturdy cookies.  
  8. Cut shapes and put them on the cookies sheets about 1 inch apart lined with parchment.  Cook for 7 - 9 minutes in most ovens.  Time varies based on cookie size and thickness.  You want to pull out at the first sign the edges are getting lightly brown or just before.
  9. Cool cookies for 2 minutes on cookie sheets then transfer to wire racks to cook completely.  Cookies are great plain or can be frosted, enjoy!

Sunday, November 30, 2014

Machine Free Pumpkin Pie Ice Cream


We love ice cream but rarely make it.  Part of the problem is the frozen bowl our mixer uses.  I don't always keep it in the freezer.  I tend to make treats when the mood strikes and with the ingredients I have on hand.  Some of my favorite recipes and epic fails have resulted in this cooking style!

I had a Costco size heavy whipping cream to use.  You know why, I couldn't bare to go to another store the Wednesday before Thanksgiving toting three small children.  Didn't I see a method of ice cream that uses heavy whipping cream?  Yes thank you Kevin and Amanda's machine free method for making an ice cream base.  So I had half a pumpkin pie and all this whipping cream.  Umm problem solved I'll make ice cream!  The result is a decadent rich ice cream that was super easy to make.  On the plus side my mom is visiting and loved it too!

Machine Free Pumpkin Pie Ice Cream

Ingredients
2 cups heavy whipping cream, chilled
14 ounces sweetened condensed milk
1/3 - 1/2 pumpkin pie cut into pieces
1 teaspoon pumpkin pie spice
1/2 teaspoon vanilla extract

Recipe  

  1. Whip heavy whipping cream until stiff peaks form.  If you over whip (as long as no solid butter has formed) you can add a few teaspoons of heavy whipping cream and whip by hand.  The cream should be good again in a few seconds.  Try not to over whip again!  I do this all the time by the way.
  2. In a large bowl whisk condensed milk, spices and vanilla extract.  Gently mix in pumpkin pie pieces.
  3. Fold the whipped cream into the condensed milk mixture until no white streaks remain.
  4. Pour into 2 quart container and freeze for at least six hours or until firm.  We let ours warm up a bit before scooping.  Scoop and enjoy!
* Ice cream method is thanks to Kevin and Amanda

Saturday, December 21, 2013

Santa Cupcakes


I always like to try my hand at new things.  I'm not even average at decorating cakes or cupcakes with frosting but I do love to eat them so I keep trying.  Rylee wanted to bring Santa cupcakes to school so I did a quick pinterest search.  Found a picture of a santa cupcake with a dead recipe link and used that as inspiration.  I think these turned out really cute and anyone can do them!  Each one will be different and have it's own little personality.  I am happy to report they were a huge hit with preschoolers and teachers alike.

Ingredients
2 dozen cooled cupcakes
8 oz block cream cheese softened
2 tsp vanilla
1 tbsp lemon juice
dash of salt
5 1/2 cups powdered sugar
red sugar crystals
red cinnamon gems
confetti tiny sugar candies (or something eye colored and round)
rainbow sprinkles (or something mouth shaped)

Instructions
  1. Bake your favorite cupcakes.  I used a vanilla cupcake, but any kind will work.  Let these cool completely before decoration.  You will have enough frosting to decorate two dozen cupcakes.
  2. Mix cream cheese, vanilla, lemon juice and salt until creamy and completely incorporated.
  3. Mix in the powdered sugar on low a little at a time, until it's all added.  Then mix on medium for a few minutes until the frosting get a bit fluffy.  You may need to scrape down the sides of the bowls a few times.
  4. Each cupcake needs a thin layer of skin colored frosting.  Put 1/2 - 3/4 cup in a bowl.  Then to the frosting in the small bowl, add 4 drops of yellow, 3 drops red and 1 drop green food coloring.  Mix completely so there are no streaks.  The frosting will be a peachy skin tone.  Top each cupcake with a thin layer of the peachy frosting,
  5. Now put your red sugar crystals in a bowl and dip each cupcake in the crystals in a crescent moon shape.  Pretty thin, this will be his hat.  You can try to make it a bit longer on one side to add the ball at the end of his hat,
  6. Place your white frosting in a bag with a small star tip or in a ziploc bag with a small snip in the corner.  Make small dots along the edge of the red crystals and a bigger one where you want his hat to have a ball.  Then continue the dots all the way around the cupcake.  Make another layer at the bottom for his beard.  Add two dots where his mustache and mouth will be.  Look at the picture as a guide.
  7. Place a cinnamon gem for his red little nose.  Two eye colored confetti's for his eyes.  And a pink or red rainbow sprinkle for his mouth,
  8. You're done!  You can immediately sample as my children did.  And I did pop them in the fridge for a few hours before transporting to school.  Some say this may dry them out but it does save the frosting if they tip over in transport, which mine almost always do!
Pinterest Inspiration Photo
This link was dead when I clicked, or maybe because I'm in USA and don't have proper fonts.
http://thebestcupcakerecipes.com/christmas-santa-cupcakes/

Friday, September 6, 2013

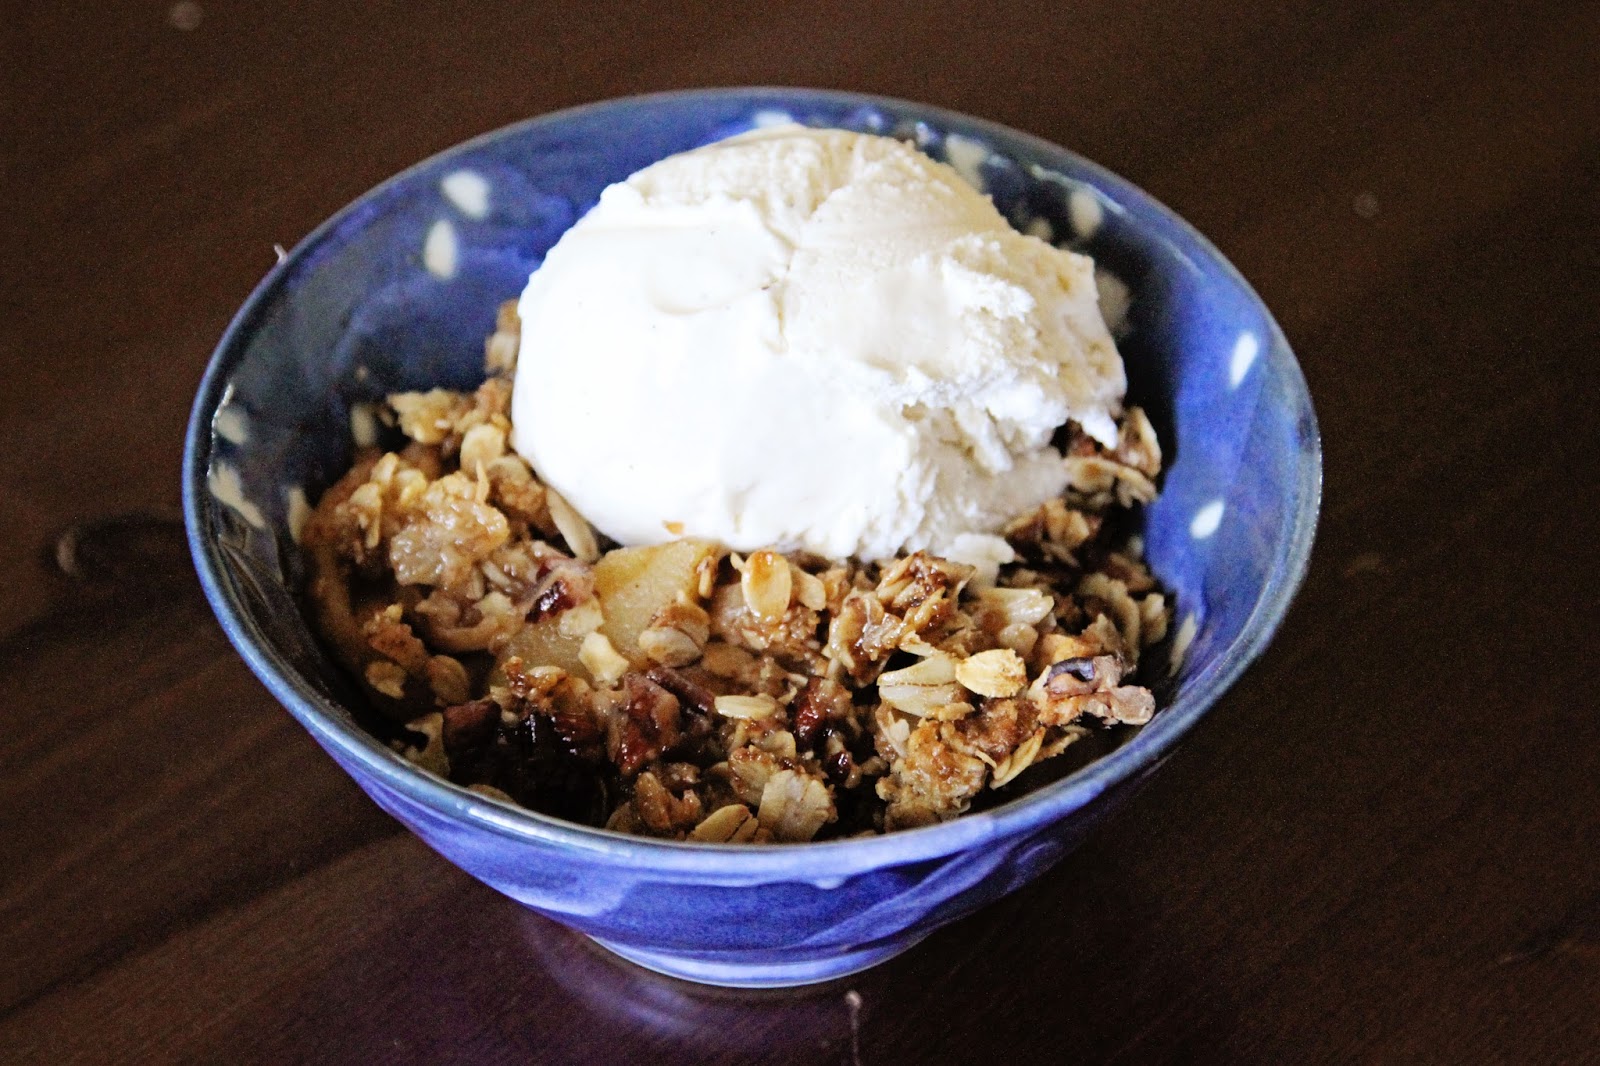
Feels Like Fall Flourless Apple Crisp


Tonight our family will be enjoying the sunshine and pool.  They kept it open an extra weekend after labor day, hip hip hooray!  But this morning was chilly and our local orchard has beautiful fresh apples out, so fall is on my mind.  What better bridge from summer to fall than apple crisp with sweet vanilla bean ice cream.  If you are like me you've made this many times.  Most of the recipes I see online have so many ingredients and way more sugar and topping than my fresh apples need.  So it was time to get cooking on my own.  The result was so good, I just might have to make it again next week.

This school year I am going to try to create a new recipe each week.  Looking to balance taste and health.  I'll spare anyone out there reading my recipe failures, but will share the ones we like.  And at the end of the school year I'll have some nice additions to my online recipe holder.  Enjoy the summer to fall bridge weeks!

Ingredients

6-8 medium apples sliced (use the ones marked good for pie or baking)
1/4 cup pure maple syrup
1 tsp cinnamon
1 1/2 cup oatmeal
1/2 cup brown sugar
1/4 cup butter chilled cut into small pieces
1/2 cup walnuts or pecans coarsely chopped

Directions

  1. Preheat Oven to 375 degrees F.  Lightly butter or oil an 8 inch baking dish or large pie dish.
  2. In a large bowl combine sliced apples, maple syrup and cinnamon.  Pour mixture into baking dish.  You will want enough apple sliced to fill the dish but not overflowing, you still need to add crumb topping.
  3. In a medium bowl combine the remaining ingredients (except nuts) using a pastry blender or two knifes until crumbly.  Keep blending until crumbly or you'll have loose ingredients that won't bake as well.
  4. Sprinkle crumble on top of baking dish.  Depending on the dish you may have more than you need.  In that case feel free to eat it!
  5. Bake for 45 minutes and serve warm.  Vanilla ice cream is a wonderful accompaniment.  Enjoy!


Monday, November 12, 2012

Dark Chocolate Lava Cakes


I have always preferred half baked cookies and french toast.  You know the type of things crunchy on the outside and melty, doughy on the inside.  So it came as no surprise years ago that I loved the first Lava Cake that I tried.  Dark intense chocolate cake with decadent melted chocolate spilling out when you slice it.  And it's served warm with a dallop of fresh whipped cream.  I never attempted to make one until this recipe because I thought they would be too difficult or time consuming.  Was I wrong!  My girls did all the stirring and dropping in of ingredients.  These are simple to make and so good.  We made ours milk free except for the optional whipped cream and loose no flavor, it's amazing.  Make them for a dinner party or holiday and you'll be sure to impress!
    Ingredients

    4 pieces (squares) Semi-sweet Baking Chocolate or 1 bag of semi-sweet chips minus a few you eat!
    ½ cups Butter or 1/2 cups fleischmann's unsalted margarine (dairy-free)
    1 cup Powdered Sugar
    2 whole Eggs or 1/2 cup pasteurized egg product
    2 whole Egg Yolks
    6 Tablespoons Flour
    Optional Whipped Topping
    2 cups Real Whipping Cream (seriously It's So Much Better!)
    2 Tablespoons Sugar

    Recipe
    1. Preheat oven to 425 degrees.  Spray 4-6 ramekins with oil and place on cookie sheet.
    2. Combine butter and chocolate in microwave safe dish.  Microwave on 50% power for 1 minute.  Stir thoroughly.  Then microwave 30 seconds more and stir.  Repeat until the chocolate in completely melted.
    3. Whisk chocolate mixture and sugar until well combined.  Whisk in eggs, then flour.
    4. Fill ramkins and back for 12-18 minutes depending on size of ramekins and oven.  All sides should be firm and just the very center soft.  
    5. Remove from oven and let cool 1 minute.  Place a plate on top of the ramekin, and flip upside down so the cake is on the plate.  This will help the inside of the cake stay put until you slice it open.
    6. Top with powered sugar and whipped cream if desired.  Combine heavy whipping cream and sugar and whip until stiff 
    Original Recipe
    Tweaked the original recipe as you will see in ingredients list, chocolate melting method and removal of cakes from ramekins.  This can be made milk free by using milk free chocolate, milk free margarine and skipping the whipped topping.  Here is the original recipe

    Wednesday, May 9, 2012

    Hot Pink Spring Nest Cupcakes

     
    We have not one, not two but three girls!  They are 4 years and younger so of course they love bright colors and pink.  So when I spotted this bright pink edible grass at Target I knew I'd be making classic nest cupcakes.  The cupcakes turn out so cute and are the perfect addition to a spring party, Easter, a rainy day, a monday, whenever
    Ingredients
    Cupcakes
    1 1/2 cups all purpose four
    1/2 teaspoon baking powder
    1/4 teaspoon fine sea salt
    1/2 cup unsalted butter or fleischmann's unsalted margarine, softened
    3/4 cup granulated sugar
    2 eggs or 1/2 cup egg beater type product, room temperature
    2 teaspoons vanilla extract
    2/3 cup whole milk, room temperature or 2/3 rice milk and 1 tablespoon lemon juice
    edible grass
    chocolate egg candies

    Frosting
    1/2 cup (1 stick) butter or fleischmann's unsalted margarine, softened
    3 1/2 cups powdered sugar, sifted
    1/4 cup whole milk or rice milk
    2 teaspoons vanilla bean paste or 1 teaspoon vanilla extract

    Recipe adapted from 
    This recipe comes from squidoo

    Frosting Recipe
    1. Beat margarine until creamy
    2. On low speed add powdered sugar
    3. Add vanilla then slowly add milk until desired consistency
    Cupcake Recipe
    1. Preheat oven to 350 degrees. Grease or line a cupcake pan with wrappers.
    2. Sift flour, baking powder and salt together
    3. Beat margarine and sugar until light and fluffy.
    4. Add eggs and vanilla and mix until blended.  Sometimes the margarine will separate, mix a bit longer
    5. Alternate adding flour and milk.  End with milk
    6. Fill cups 2/3 full and bake 20-24 minutes.  Remove from pan after cooling for 1 minute and place on wire rack.
    7. Frost cupcakes, add decorative grass and chocolate egg candies
    Original Recipe Modifications
    • used flieschmann's unsalted margarine instead of butter
    • used real eggs from Costco (like eggbeaters) instead of eggs so the girls can safely sample the batter
    • used rice milk instead of whole milk with a tablespoon of lemon
    • used vanilla instead of vanilla paste

    Thursday, April 12, 2012

    Decorate Your Own Sugar Cookie

     
    One of my favorite sugar cookie recipes is from cooking light.  I don't feel nearly as bad when I cover it in frosting and decorations!  My girls love to help bake and I almost always let them help.  Sugar cookies can be messy and they always try to eat the decorations and frosting.  So I decided to not fight it, just go with it.  They each got their own cookie, frosting and decorations.  I let them decorate however they wanted and double dip in their personal pots after tastes.  They ended up with beautiful half eaten cookies and I managed to get all the rest pretty while they were busy.  This will be a fun activity for a playdate, maybe an outdoor playdate where the ants can eat the crumbs!

    Recipe Modifications
    • used pastuerized egg product
    • used fleischmann's unsalted margarine
    • used rice milk
    • we made these for St Patrick's day not easter.  Any cookie cutter or cup will work
    Ingredients
    Cookies:
    1 1/2 cups all-purpose flour (about 6 1/2 ounces)
    1/2 teaspoon baking powder
    1/2 teaspoon baking soda
    1/4 teaspoon salt
    1/2 cup granulated sugar
    1/4 cup butter, softened
    1 teaspoon vanilla extract
    1 large egg

    Icing:
    2 cups powdered sugar
    3 tablespoons fat-free milk
    1/4 teaspoon vanilla extract
    Food coloring (optional) 


    Recipe
    This recipe comes from one of my favorite sites cooking light

    Tuesday, April 10, 2012

    Raspberry Frosted Vanilla Mini Cupcakes

     
    I picked up a subscription to Food and Wine magazine recently for my daughter's school fundraiser. I have already found several great recipes.  This cupcake just looked pretty and I knew it would have to be yummy too.  I tweaked the recipe from strawberry to raspberry and eliminated the milk products.  Instead of regular cupcakes we made mini ones.  I would guess you could use any type of berry jam.  Be careful to not add too much the frosting will get soft.  These were the perfect sweet treat to bring our dinner club and so pretty.

    Recipe Modifications
    • used fleischmann's unsalted margarine
    • used vanilla rice milk
    • you can use your favorite white or cream cheese frosting recipe and just add jam to taste.  I added raspberry jam and topped with fresh raspberries instead of strawberry
    • made mini cupcakes instead of regular ones
    • frosting was a bit soft so popped in the fridge before traveling with them
    Cupcake Ingredients
    1 cup plus 2 tablespoons all-purpose flour
    2 tablespoons cornstarch
    1 1/4 teaspoons baking powder
    1/8 teaspoon salt
    3/4 cup granulated sugar
    2 large eggs, at room temperature
    1 1/4 teaspoons pure vanilla extract
    4 tablespoons unsalted butter, melted
    1/4 cup vegetable oil
    1/2 cup milk, at room temperature
    Recipe
    This recipe comes from Food and Wine

    Dark Chocolate Sprinkled Rice Krispie Pops

     
    These are so easy and yummy that I will be making them again and again!  Rice Krispie treats are something most of us don't outgrow.  Add rich dark chocolate, sprinkles and a stick to keep your hands clean and you have the perfect treat.  These are also great for the little helpers in your life.  My 2 year old was able to dip in the chocolate and sprinkles herself.  She did try to eat them as she made them though ;-)  You could easily change this up by dipping in nuts, seasonal sprinkles, changing the color of the chocolate, making the treats different sizes, chocolate then mini marshmallows than carmel then chocolate again...I could go on forever.  Now I want one, and of course they'be been eaten up!

    Ingredients
    3 tablespoons butter or margarine
    1 package (10 oz., about 40) regular marshmallows
    - OR -
    4 cups miniature marshmallows
    6 cups Kellogg's® Rice Krispies® cereal
    1 bag dark chocolate chips
    sprinkles
    popsicle sticks
    ribbons to decorate if you'd like

    Recipe
    1. Make rice Krispies according to recipe on the box, allow to completely cool.  I used an 8x8 pan and made sure they were pressed evenly in the pan
    2. Cut treats into popsicle sized bars
    3. Melt chips in microwave in 30 second increments on 50% power, stirring thoroughly after each increment
    4. Place sprinkles in bowl
    5. Stick a popsicle stick into each treat and dip in chocolate, then dip into sprinkles
    6. Place in fridge to set and then server at room temperature
    This recipe found at Twig and Thistle blog

    Saturday, March 3, 2012

    Valentines Ice Cream Cake Pops


    I am a huge believer in finding the joy in life.  Valentines Day is so much more fun now that we have children! We went all out this year and tried out this super cute cake pop recipe.  The girls got to make home-made valentines and treats for their neighborhood friends.  This recipe is less healthy and less homemade than the majority of our cooking but that's alright it's fun to have a special treat now and then ;-)  And everyone loved the pops so if you are looking for a cute birthday idea these are sure to please and can be decorated for any holiday or celebration

    Recipe Modifications
    • I used a cookie scooper to scoop the cake balls.  They look just like mini ice-cream scoops
    • I found my balls too big to dip in the chocolate without falling apart.  So I dipped cone in chocolate, put the cake ball on and then used a spoon and poured over the balls.
    • I bought plastic wine glasses from the dollar store and used a beer six pack to transport the pops.  Worked perfectly!
    Ingredients
    1 9x13 cake mix (homemade or box)
    1.5 to 2 cups cream cheese frosting 
    Sugar cones
    Chocolate candy melts (I used Wilton)
    Sprinkles
    Sweet Hearts candy
    Serrated knife
    Styrofoam
    Lollipop sticks

    Recipe
    This recipe comes from cakepopsgalore

    Friday, February 10, 2012

    Dark Chocolate & Tart Cherry Granola Bars


    I saw this recipe and thought what a great idea and then completely forgot about it!  Thanks to the magic of Facebook and Pinterest, I rediscovered the recipe.  Homemade healthy granola bars that my girls and I would love and are easy to throw in my purse to eat when you need a snack.  What could be better!  After reading the reviews I made some tweaks and came out with a healthy, yummy, chewy, chunky and portable granola bar.  I will definitely be trying my hand at granola bars again.  I'm thinking of doing a cinnamon maple oat one next.  These are seriously so easy to make and you'll get a more nutritious bar for much less bank.

    Recipe Modifications
    • used 1/4 cup canola and 1/4 cup olive oil
    • used 1/3 cup chocolate chips and 1/2 cup chopped dried tart cherries
    • cooked in glass dish and bars were about 2.5 inches thick instead of 1.  made 20 bars
    • cooked for 20 minutes and let cool hour.  They crumbled when cut so baked additional 25 minutes. smushed down when I got them out of the oven to really compact.  Then cooled for 30 minutes.  Then put in fridge until they were cold.  After that they cut great!  Next time just bake for 40, smash to compact and cool in fridge before cutting
    Ingredients
    4 Cups Old Fashioned Oats
    1/4 Cup Whole Wheat Flour
    1/2 Cup Shredded Unsweetened Coconut
    1/3 Cup Brown Sugar
    1 Cup Chocolate Chips*
    1/2 Tsp Kosher Salt
    1/2 Cup Canola Oil
    1 Tsp Vanilla Extract
    1/2 Cup Honey

    Recipe
    This recipe comes from one of my favorite blogs weelicious

    Friday, January 27, 2012

    Snickerdoodles


    Growing up I loved snickerdoodles.  I started cooking and baking at an early age and these were probably the first cookie that I mastered.  As an adult I still adore these cookies and now that I have children of my own they are even more fun to make with my "helpers". I will admit we do eat more dough than usual and I still sneak one half baked cookie out of the oven and eat it with a spoon!  Oh happy childhood memories.  This version of the recipe is much lighter than the one I started out with and lacks nothing as far as taste goes, enjoy!
    Recipe Modifications
    • used pasuerized eggs 1/4 cup
    • used fleishmann's unsalted margarine
    • chilled the dough for 30 min - 1 hour before rolling
    • used 2/3 white sugar instead of 3/4 cup
    • added extra flour tablespoon at a time to compensate for margarine and less sugar
    • added extra cinnamon to rolling mixture
    • baked for a few extra minutes.  Our dough was colder and cookies slightly bigger,  I like them chewy center and crisp outside
    • used parchment paper and no cooking spray
    Ingredients
    3/4 cup granulated sugar
    2/3 cup light brown sugar
    1/2 cup butter, softened
    1 teaspoon vanilla extract
    1 large egg
    1 1/2 cups all-purpose flour (about 6 3/4 ounces)
    1 teaspoon baking powder
    1/2 teaspoon ground cinnamon
    1/4 teaspoon salt
    1/3 cup granulated sugar
    1 1/2 teaspoons ground cinnamon
    Cooking spray
    Recipe
    This recipe comes from my favorite source Cooking Light. Not diet food, but food that is conscious of health without losing any flavor. Food for life!

    Tuesday, January 24, 2012

    Baked Acorn Squash

     
    Michael and I love our bowls of ice-cream but when the cold weather comes you crave something warm when you want a sweet treat.  One of our favorite easy and not bad for you treats is acorn squash with a bit of butter and brown sugar.  It's good on it's own just mashed up too.  This recipe is really simple but I thought I'd share for those of you out there who have not had a chance to try this yummy treat.  Looking at this picture I want another one right now!

    Ingredients
    acron squash - 1 acorn squash feeds two.
    2 tablespoons brown sugar per acorn squash
    2 tablespoons butter or margarine per acorn squash
     
    Recipe
    1. Preheat the oven to 400.
    2. Cut acorn squash in half and scoop out seeds with a spoon.
    3. Place sqaush on cookie sheet, hallowed out side up.  Add a tablespoon of butter or margarine and 1 tablespoon of brown sugar to the center of each squash half. 
    4. Roast for 1 hour of until the flesh is soft when poked with a fork. 
    5. We like to mash ours up with a fork when it's down and eat right in the squash skin!
    Note: Many people add maple syrup and salt to these as well.  We find them pleny sweet without the syrup.  I have substitued 2 teaspoons of real maple syrup for the brown sugar.

    Saturday, January 21, 2012

    Crisp Chewy Chocolate Chip Cookies

     
    Browsing recipes for cookies we found this one and had to try it.  I love crispy chewy cookies.  Could the recipe really be true, is it possible to have a perfectly balanced, super yummy crispy on the outside and chewy in the middle cookie?  The first thing we noticed is the dough is absolutely my favorite dough that we have ever made.  It's outstanding.  And when we got to the baking, well all the hype is true!  These cookies are amazing.  I only wanted a few for each of us.  So I scooped the extra dough on a cookie sheet and froze for about two hours.  Then I transferred to a freezer bag.  Now the cookies are ready for me to bake another day or pop on out for some raw cookie dough goodness.

    Recipe Modifications
    • I used pasteurized eggs so I can safely eat the dough and the kids too!
    • I am eating milk free so I used fleishmann's unsalted margarine and milk free chocolate chips.   Think these may be even better with fresh real butter, cannot wait to try it
    • It took longer to bake then suggested in the recipe.  I've never baked at 325 and it took some extra time.  But be careful not to over bake or you will look the chewy!
    Ingredients
    2 cups all-purpose flour
    1/2 teaspoon baking soda
    1/2 teaspoon salt
    3/4 cup unsalted butter, melted
    1 cup packed brown sugar
    1/2 cup white sugar
    1 tablespoon vanilla extract
    1 egg
    1 egg yolk
    2 cups semisweet chocolate chips

    Recipe
    This recipe comes from Smitten Kitchen a super yummy and fun food blog 

    Thursday, January 19, 2012

    Just Like Hostess Cupcake


    I saw a picture of a cupcake that looked like those hostess ones that used to be packed in school lunches, you know in the old school metal lunch boxes right by the fruit punch pouch and p&j sandwich.  It was intriguing and as I'm soy, milk and nut free right now I decided to make it all from scratch.  The end result was yummy yummy yummy!  I didn't even like these growing up, but I like this adult version.  t think it will be even better when I can make it using real butter, there is no real substitute for the taste of real butter in my opinion.  I learned a few things.  The glaze is amazing an my new favorite for donuts and cupcakes.  And be careful if you put too much filling in a cupcake it will explode!  And yes, there are allot of steps but they are worth the end result just be patient.  We decided to decorate with loopy W's for our last name, Cadence is learning letters right now. 

    Recipe Modifications
    • I made these milk protein, soy protein and nut free.  So I always used fleishmann's unsalted dairy-free margarine and rice milk
    White Icing Ingredients
    1 cups confectioner sugar
    1 tablespoons butter (softened) or fleishmann's unsalted dairy-free margarine
    1/2 teaspoon vanilla
    1/2 teaspoon water
    1-2 teaspoons milk or rice/almond milk

    Chocolate Glaze Ingredients
    1 1/2 cups chocolate chips
    3/4 stick (6 tablespoons) butter or or fleishmann's unsalted dairy-free margarine
    2 tablespoons light corn syrup
    1 teaspoon vanilla extract

    Vanilla Cupcake Ingredients
    1 1/2 cups all purpose four
    1/2 teaspoon baking powder
    1/4 fine sea salt
    1/2 cup unsalted butter, softened or fleishmann's unsalted dairy-free margarine
    3/4 cup granulated sugar
    2 eggs, room temperature
    2 teaspoons vanilla extract
    2/3 cup whole milk, room temperature or rice/almond milk

    Marshmallow Filling Ingredients
    1 1/2 cups marshmallow cream
    1 stick (1/2 cup) butter, at room temperature or fleishmann's unsalted dairy-free margarine


    Cupcake Construction
    1. Make and bake the vanilla cupcakes.  You can use a box mix or the recipe for vanilla cupcakes below is good.  You don't want too sweet of a cupcake or the end cupcake will be too sweet.
    2. Make the Marshmallow filling from the home made simple link and put into fridge.
    3. After the cupcakes have cooled.  Fill a pastry bag with a large round tip.  Press the tip into the center of each cupcake and carefully fill it.  Be careful if you fill it too much it will crack!
    4. Make the Chocolate Glaze from the home made simple link.  Dip each cupcake into the glaze.
    5. Place all glazed cupcakes into the fridge and allow to cool for 20 minutes or more.
    6. Place the icing in a bag with a tip or plastic bag and cut a corner.  Then it's time to decorate.  We decided on loopy W's to go with our last name
    Recipe Links
    This recipe was inspired by a home made simple recipe for cream-filled cupcakes

    The vanilla cupcake recipe is from squidoo

    Recipe for White Icing
    1. Mix all ingredients except milk.  I use a hand mixer for this.
    2. Add milk a little at a time until a thick glaze is formed.

    Friday, October 28, 2011

    Pumpkin Donuts


    Today we got lucky and called up two families we like to play with for a last minute no notice playdate.  We only had an hour and a half to play and the kids took full advantage.  While they ran around using up energy the moms hung out in the kitchen and made these yummy pumpkin donuts.  I swear I'm not obsessed with donuts, it's just so nice to be able to enjoy a fall treat while I'm eating soy and dairy free.  I'd say it was an hour and a half well spent!  Now if only I had a pumpkin late to go with the donut...


    Recipe Modifications
    • used fleishmanns unsalted margarine (dairy-free)
    • used kirkland real eggs (like egg-beaters)
    • Used own topping instead of the on in the recipe 
    • added 1/2 cup pumpkin
    • the batter is super thick and there isn't any to spare.  I used the baggy to put in pan then spread with a butter knife
    Ingredients
    For the donuts:
    Baking spray
    1 cup flour
    1/4 cup + 2 Tbsp sugar
    1 Tbsp butter, cold
    1 tsp baking powder
    1/4 tsp cinnamon
    1/4 tsp nutmeg
    1/8 tsp ground ginger
    1/8 tsp cloves
    1/2 tsp salt
    1/4 cup + 2 Tbsp canned pumpkin (not pumpkin pie filling)
    1 egg
    1 tsp vanilla

    For the topping
    1/4 cup sugar
    1/4 cup brown sugar
    dash or two cinnamon
    dash nutmeg
    2 tablespoons fleishmanns unsalted or other butter/margarine

    Recipe
    This recipe comes from a food blog new to me Confections of a Foodie Bride but I like it!

    For the topping
    1. After the donuts cool.  Melt the butter in shallow bowl.  
    2. Mix sugars and spices in another shallow bowl.
    3. Dunk donuts in butter on both sides then roll in the sugar mixture


    Wednesday, October 26, 2011

    Diary-Free Hot Cocoa


    Today felt a bit dreary and chilly and I just picked up some cocoa so we decided to experiment and create a yummy dairy free hot cocoa.  The end result was a success!  I have tried in the past but couldn't get it right with rice milk.  The thicker consistency of almond milk was just what we needed.  And at only 40 calories for a cup of almond milk even with sugar and marshmallows this is a treat that tastes much more indulgent than it is.  Might try sweetening with honey the next go around.  

    Ingredients
    dash of salt
    3/8th cup of sugar
    1/4 cup of cocoa
    1/3 cup of water
    2 cups unsweetened vanilla almond milk
    marshmallows or marshmallow fluff

    Recipe
    1. Cook salt, sugar, cocoa and water over medium high heat until it boils stirring frequently.  Cook for a minute at a boil stirring constantly.
    2. Add almond milk and cook until hot, does not need to boil.
    3. Carefully pour into cups and top with marshmallows, enjoy!
    Note:  You may try adding vanilla extract but we found that this gives an off taste with almond milk.  You are better off using the unsweetened vanilla almond milk.

    Saturday, October 22, 2011

    Maple Walnut Apple Crisp


    Today was my oldest daughter's first parent accompanied field trip.  We went to Erie Apple Orchard and got to pick apples, pick out a pumpkin, go for a hay ride, see how apple cider is made and of course eat cider and donuts.  The sun was trying to peak out after days of rain and the air was crisp as it should be in fall.  It was a great start to the many field trips to come and made us all want a nice warm yummy fresh apple crisp.  Here is our family's favorite recipe.  After trying Maple syrup I don't think I'd go back to sugar on the apples, it's so good!  And it's even good enough you don't have to top with ice-cream, although we often do

    Recipe Modifications
    • This recipe is from Cooking Light so it's still yummy but light.  Well I take away a bit of the light because I love the topping so I use 1 1/2 the amount the recipe calls for
    • I am eating milk free so I substituted Fleishman's unsalted margarine for butter
    • I never measure the apples I just fill up my pie plate all the way to the top.  I also eye the maple syrup and let the girls sprinkle the cinnamon.  You don't need allot of syrup and we always use real Maple Syrup
    • Make sure you really work the crumple until all the ingredients combine into a nice true crumble.  There shouldn't be allot of loose sugar and flour.  For some reason it took me years to learn this!  And buying a cheap pastry blender is so much easier than using the double knife method
    • You can use many types of apples for this.  Most fruit markets will suggest of have signs for apples that are good for baking
    Ingredients
    1/3 cup all-purpose flour
    1/2 cup packed light brown sugar
    1/3 cup regular oats
    1/4 teaspoon ground cinnamon
    1/4 cup chilled butter or stick margarine, cut into small pieces
    3 tablespoons chopped walnuts
    7 cups sliced peeled Rome apple (about 3 pounds)
    1/4 cup maple syrup
    1/2 teaspoon ground cinnamon

    Recipe
    This recipe comes from my favorite source Cooking Light. Not diet food, but food that is conscious of health without losing any flavor. Food for life! 

    Sunday, October 16, 2011

    Apple Cider Donuts


    The weather outside is dreary and I have two little girls that want to bake so we made up a new donut recipe!  These are apple donuts with a cider glaze or sugar and cider topping.  They were a huge hit today and will be added to our must-make-for-fall list.  Next weekend I'm thinking pumpkin, I absolutely love pumpkin baked goods.  One benefit of eating milk and soy free right now is that it's forcing me to create my own recipes.  Almond milk bakes very well but does impart a bit of almond flavor.  Rice Milk doesn't bake as well but doesn't add a flavor.  Good thing we love almonds ;-)

    Ingredients for 6 donuts
    1 cups all-purpose flour
    1/4 cup brown sugar
    1 heaping teaspoon baking powder
    dash or two  ground nutmeg (optional)
    dash or two ground cinnamon (optional)
    1/2 teaspoon salt
    1/4 cup almond milk (we use almond breeze original, they come in milk box size)
    * can substitute buttermilk or make your own with skim/1% and vinegar) 
    1 eggs, beaten
    1 teaspoon vanilla extract
    1 tablespoon margarine melted (smart balance light in the tub is dairy and soy free)  or butter melted
    1/2 cup applesauce
    1 1/2 teaspoons real maple syrup (costco has a good deal on the real stuff!)

    Sugar Coating 
    1/4 cup white sugar
    1/4 cup brown sugar
    1 tablespoon cinnamon
    1 tablespoon margarine melted (smart balance light in the tub is dairy and soy free)  or butter melted
    1/4 to 1/2 cup apple cider

    Glaze
    1/8 cup apple cider
    1 cup powdered sugar
    pinch of salt 

    Donut Recipe
    1. Preheat oven to 400 degrees.  Spray a doughnut pan with non-stick spray.
    2. In a large bowl, combine flour, sugar, baking powder, nutmeg, cinnamon and salt with a whisk. 
    3. Stir in milk, eggs, vanilla, apple sauce, maple syrup and melted butter. Beat together until well blended.
    4. Pour dough into a ziplock bag.  You can place bag in a large mug to make purring easier.
    5. Snip of one corner of ziplock bag and fill each doughnut cup almost but not quit full.  These are more dense donuts and will not rise as high as some recipes. 
    6. Bake 8 to 10 minutes in the preheated oven, until doughnuts spring back when touched. They will not be brown, should appear still pale.  Allow to cool for two minutes before removing from pan.  These took two minutes longer in my oven then less dense donuts.
    7. Cool completely before adding toppings.
    Sugar Coating
    1. Combine white sugar, brown sugar and cinnamon in shallow bowl.
    2. Pour enough cider into small bowl to cover bottom.
    3. Dunk donuts on both sides in cider quickly, shake off excess, and then roll to cover completely in sugar.
    Apple Cider Glaze
    1. Microwave cider in small bowl for 40 seconds.
    2. Add powdered sugar and salt to bowl and whisk until smooth.  
    3. Dunk top of donuts in mixture.  Let cool and glaze will harden.